The challenge for November was to NOT use black ink and NOT color the images with Copics (or other markers). So, we were asked to use colored inks instead! I used the only other ink colors that I own, and I think it turned out pretty cute and simple. I stamped the card in a shimmery white, as well as a piece of green "scrapstock" with the word JOY. I then used a green and a light tan ink pad to stamp the Christmas tree image. I added a little Stickle action after diecutting the green sentiment and image with Nesting Lace Ovals from Lifestyle Crafts.
Tuesday, November 29, 2011
Sunday, November 20, 2011
Here ya go, Momma!
Here are pictures of some commissioned Christmas cards I just finished up. These gave me a great opportunity to use my Copics! A little twine and some pop-dots, along with a few stamps made for quick work of these custom cards.
Monday, November 7, 2011
Christmas is around the corner!
Christmas is coming! It is such an exciting time for crafters!
There is still about a week and a half left for you to order Christmas cards from me to give to your loved ones this holiday season! November 18 is the deadline to place an order if you want them by December 1! Here are the images:
Remember, these are customizable as far as the background colors are concerned. Also, a sentiment (Merry Christmas, Happy Holidays, etc.) will be included once you tell me what you would like. These are hand colored stamped images, complete with glitter and sparkle. The holly vines are die cut and layered and accented with rhinestones. 6 cards with envelopes is $24, and they get cheaper for larger quantities. Please email me at elizabethvetos@sbcglobal.net for more information and to order!
There is still about a week and a half left for you to order Christmas cards from me to give to your loved ones this holiday season! November 18 is the deadline to place an order if you want them by December 1! Here are the images:
Remember, these are customizable as far as the background colors are concerned. Also, a sentiment (Merry Christmas, Happy Holidays, etc.) will be included once you tell me what you would like. These are hand colored stamped images, complete with glitter and sparkle. The holly vines are die cut and layered and accented with rhinestones. 6 cards with envelopes is $24, and they get cheaper for larger quantities. Please email me at elizabethvetos@sbcglobal.net for more information and to order!
Monday, October 31, 2011
Happy Halloween!!
Halloween is so much fun! I can't believe it's my son's 5th time Trick-or-Treating already!! Today in his preschool class, they are having a costume party, so little Optimus Prime and I decided to make some treats to share with his school friends:
Thanks to the Lifestyle Crafts die Triangle Box, available at Scrapy Land at a great price, these boxes were a snap to put together! These were not my idea, but thanks to a friend at the Scrapy Land message boards, it's a winner! I used Scortape to adhere the glitter to the sides, some wiggly eyes, fall colored yarn, and a Zig pen for drawing mouths. These little guys are bursting with 3-5 pieces of Halloween treats and will be in the hands of 4 year olds in just a couple hours!
There's still time, so go make something SPOOKY!!
Thanks to the Lifestyle Crafts die Triangle Box, available at Scrapy Land at a great price, these boxes were a snap to put together! These were not my idea, but thanks to a friend at the Scrapy Land message boards, it's a winner! I used Scortape to adhere the glitter to the sides, some wiggly eyes, fall colored yarn, and a Zig pen for drawing mouths. These little guys are bursting with 3-5 pieces of Halloween treats and will be in the hands of 4 year olds in just a couple hours!
There's still time, so go make something SPOOKY!!
Wednesday, October 26, 2011
Fall Frenzy!
Woohoo! It's Fall Frenzy week at Scrapy Land and we've been seeing some really great projects since Monday! Last night's live video showed us the "Left to Right" card, and here is my take on it!
You can see how it flips open, and here is one shot of part of the inside..
Then of course the right side flips up to reveal the sentiment. Super quick, and super cute!
Go make something spooky!!
You can see how it flips open, and here is one shot of part of the inside..
Then of course the right side flips up to reveal the sentiment. Super quick, and super cute!
Go make something spooky!!
Tuesday, October 18, 2011
Trick or Treat...
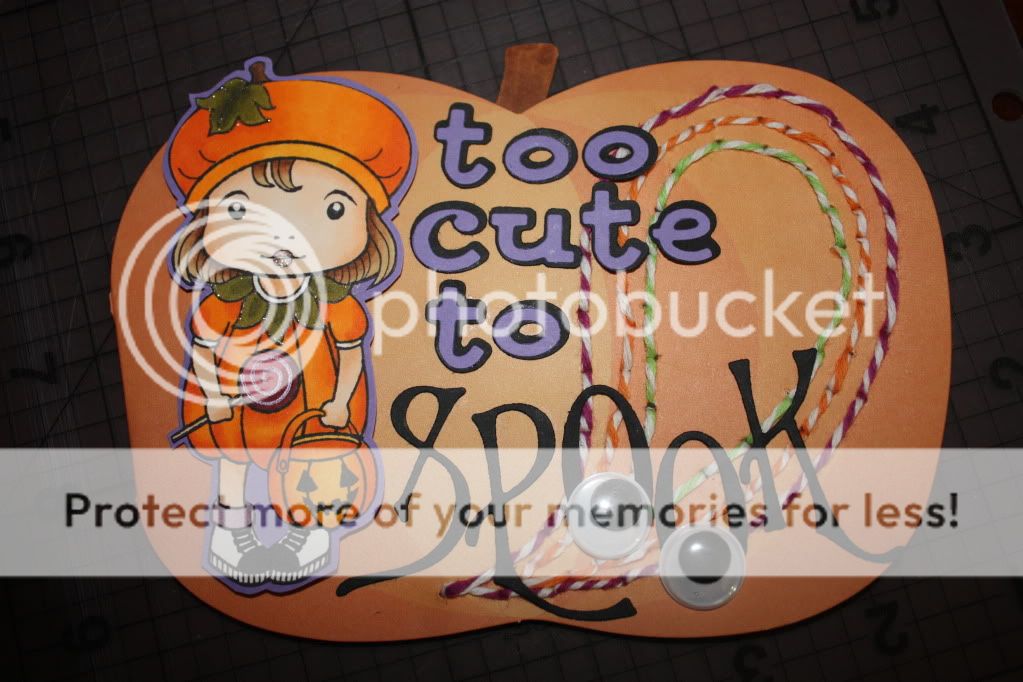
Here's another Halloween goodie with Pumpkin Marci. I cut and colored four of her for specific cards, so depending on what I come up with, you may see her four times in a row here! Fonts are Maggie/Shadow and Eliza.
Sunday, October 16, 2011
It's about time!
It's been nearly two weeks since I've posted some inspirational images, for which I apologize! I am delighted to share a card with you that I finished this evening, using a stamp I was so excited to get!
I'll get the supply list out of the way now-
Lifestyle Crafts Dies: Lemonade Alphabet (word "or"), Blossom Grand Alphabet ("T"), Special Delivery gift set alphabet, Nesting Stars, Cookie Cutter Stars
Stamp: Pumpkin Marci from La La Land Crafts
Markers: Copics!!!
The rest: Papers from Die Cuts with a View, baker's twine in fuchsia, glitter pen from Gelly Roll, Memento inks
The green wavy rectangle underneath Marci is not a die; I traced an acrylic stamping block and cut it out. Also, in case you aren't able to tell, the three stars at the bottom left are cut-outs, and there is a large star glued on the inside of the card to tie the theme together a bit. Without further hesitation, here she is!
And here is a close-up of Miss Marci:
If you ever want to know the Copics colors that I used for an image, please leave a comment and I will be happy to edit the post to include them!
Now, go make something SPOOKY!
I'll get the supply list out of the way now-
Lifestyle Crafts Dies: Lemonade Alphabet (word "or"), Blossom Grand Alphabet ("T"), Special Delivery gift set alphabet, Nesting Stars, Cookie Cutter Stars
Stamp: Pumpkin Marci from La La Land Crafts
Markers: Copics!!!
The rest: Papers from Die Cuts with a View, baker's twine in fuchsia, glitter pen from Gelly Roll, Memento inks
The green wavy rectangle underneath Marci is not a die; I traced an acrylic stamping block and cut it out. Also, in case you aren't able to tell, the three stars at the bottom left are cut-outs, and there is a large star glued on the inside of the card to tie the theme together a bit. Without further hesitation, here she is!
And here is a close-up of Miss Marci:
If you ever want to know the Copics colors that I used for an image, please leave a comment and I will be happy to edit the post to include them!
Now, go make something SPOOKY!
Subscribe to:
Posts (Atom)